
Designing for CNC machining often feels like a balancing act between intent and reality. Since 2004, I’ve seen countless CAD models that look perfect on a screen but result in eye-watering quotes because of simple geometry choices. At MS Machining, we live by a simple rule: Precision is our business, but over-engineering is your expense. If you want to slash your production costs without sacrificing quality, start with how you handle internal corners.
Optimize Internal Cavities and Fillet Radii
Design for Round Tools, Not Square Screens
CNC milling is a subtractive process using rotating, cylindrical tools. It sounds obvious, but many designers still include sharp internal corners in their cavities. To create a 90-degree internal corner, we can’t use a standard mill; we have to use EDM (Electrical Discharge Machining), which is a slow, specialized, and expensive secondary process.
- Avoid Square Corners: Always use a radius for internal vertical edges.
- Physics of the Tool: When a tool enters a corner with the same radius as the tool itself, the contact area increases instantly, leading to tool chatter and potential breakage.
The 110% Rule for Fillets
To keep the machine running fast and the finish smooth, follow the 110% Rule. Your internal fillet radius should be roughly 10% larger than the radius of the cutting tool. For example, if you intend for us to use a 10mm end mill (5mm radius), design your fillet at 5.5mm.
| Feature | Design Choice | Impact on Cost |
|---|---|---|
| Sharp Internal Corner | 0mm Radius | High (Requires EDM) |
| Matched Radius | Fillet = Tool Radius | Moderate (Slow feed, vibration) |
| Optimized Radius | Fillet > Tool Radius | Low (Fast feeds, better finish) |
Technical Benefits of Over-Sized Fillets
By making the fillet slightly larger than the tool, we achieve:
- Reduced Tool Deflection: The tool “sweeps” through the corner rather than digging in.
- Faster Feed Rates: The machine doesn’t have to decelerate aggressively to manage the load.
- Vibration Control: Less chatter means a superior surface finish (Ra) straight off the machine.
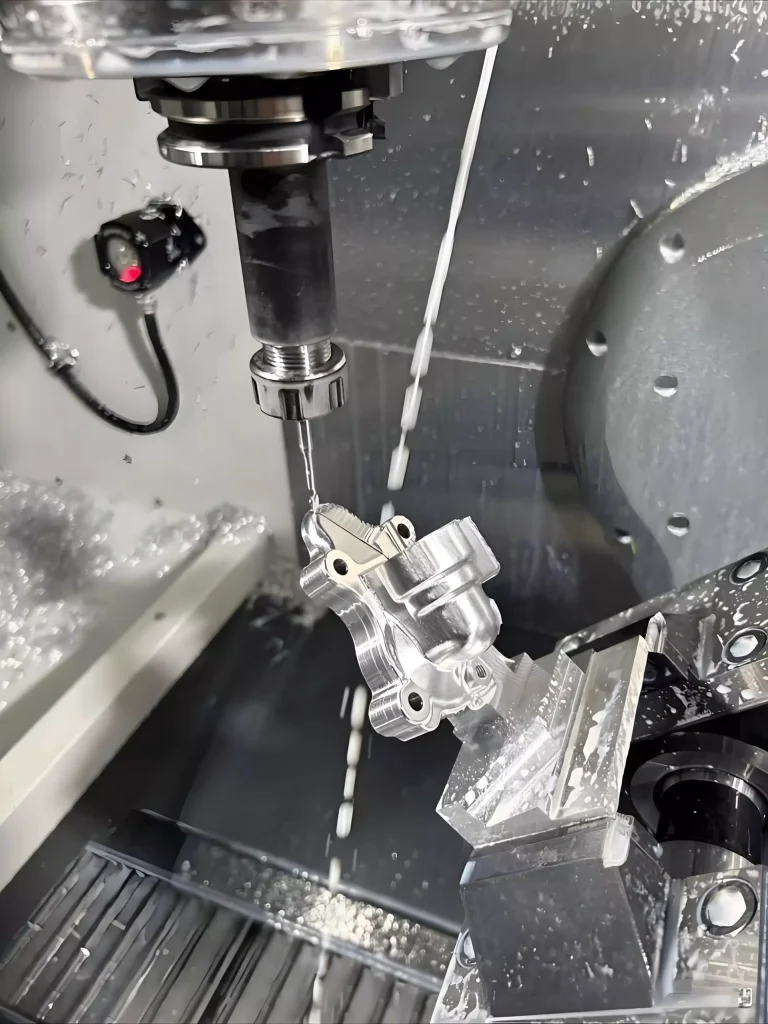
VERICUT Simulation and Stress Prevention
We don’t guess—we verify. Using VERICUT simulation, we analyze the tool path before a single chip is cut. This allows us to identify points of high tool stress in deep cavities. If your fillets are optimized, the simulation shows a consistent material removal rate, ensuring your part doesn’t become a “scrap pile” statistic due to tool failure.
Tip 2: Be Realistic with Dimensional Tolerances
One of the quickest ways to blow a budget is “over-tolerancing.” In my experience, designers often default to tight constraints out of habit, but chasing perfection comes at a massive premium. The relationship between precision and price isn’t linear—it’s exponential.
The Exponential Cost Curve
Moving from a standard tolerance of ±0.1mm to a high-precision ±0.01mm can easily double the production cost. Achieving these “tight tolerances” requires slower feed rates, specialized inspection tools, and more frequent tool offsets to account for heat expansion. If you are questioning how accurate is cnc milling for your specific application, remember that every extra decimal point adds significant machine setup time and QC labor.
| Tolerance Grade | Relative Cost | Manufacturing Impact |
|---|---|---|
| ±0.1 mm | 1.0x (Baseline) | Standard high-speed machining |
| ±0.05 mm | 1.5x | Increased inspection & slower feeds |
| ±0.01 mm | 2.0x+ | Specialized tooling & climate control |
Focus on Critical Interfaces
Don’t apply a “global” tolerance to the entire CAD model. Instead, focus your precision budget only on critical interfaces—the specific surfaces where parts must mate or move together. For non-functional features, such as external aesthetics or weight-reduction pockets, I always recommend standardizing to ISO 2768 (Medium). By keeping non-essential dimensions “loose,” we can maximize the material removal rate and keep your per-unit price down.
- Critical Surfaces: Bearings, press-fits, and sliding tracks (Keep tight).
- Non-Functional Features: Clearance holes, chamfers, and outer profiles (Keep loose).
Tip 3: Limit Pocket Depth-to-Width Ratios
Deep pockets are one of the most common hidden expenses in subtractive manufacturing costs. When a cavity is designed too deep, it requires specialized, long-reach cutting tools. These tools are less rigid and prone to “wandering” or vibrating, which forces us to slow down the Material Removal Rate (MRR) to maintain accuracy.
The 4:1 Ratio Rule
To keep your production budget under control, I recommend following the 4:1 ratio rule. Ideally, the depth of a pocket should be no more than four times its width. Staying within this “sweet spot” allows for standard CNC setups and faster machining speeds.
- Avoid Tool Deflection: Shorter tools are more stable, ensuring better surface finishes and tighter wall thickness control.
- Reduce Tooling Costs: Deep cavities often require custom or expensive carbide extensions that drive up the per-unit price.
- Design Alternatives: If your part requires extreme depth, consider splitting the design into two separate components that can be fastened together later.
For complex geometries or extremely narrow slots where traditional milling tools can’t reach effectively, we sometimes utilize specialized types of electric discharge machining to achieve the desired depth without risking tool breakage. However, designing for standard milling remains the most cost-effective path for high-volume production.
Tip 4: Design for Single-Setup Machining
In CNC manufacturing, machine time is actually quite affordable compared to manual labor. The real cost driver is the time a technician spends stopping the machine, unclamping a part, flipping it, and recalibrating the coordinates for a new orientation. Every time we have to “touch” the part, your price goes up.
Labor Costs vs. Machine Time
Manual re-fixturing is often the most expensive variable in your quote. To keep costs low, we aim to complete as much machining as possible in a single operation. By designing your parts to minimize the number of times they need to be flipped, you directly reduce the labor hours billed to your project.
Leveraging 5-Axis Centers
We utilize advanced 5-axis CNC machining to tackle complex geometries in a single “grab.” While a 3-axis machine might require three or four separate setups to reach every face of a block, our 5-axis centers can rotate the part to access multiple angles without human intervention. This significantly cuts down on machine setup time and ensures better feature-to-feature accuracy since the part never leaves the initial fixture.
Visualizing the Setup
When you are in the CAD phase, try to visualize how a cutting tool will reach each feature. If a part requires features on all six sides, it will inevitably be more expensive than a part where all features are accessible from one or two directions.
- Consolidate Features: Try to move holes or pockets to the same face to avoid extra rotations.
- Use Standard Workholding: Design parts with at least one flat surface that we can easily grip in a standard vise.
- Minimize Fixture Complexity: Parts that require custom “soft jaws” or specialized jigs will always carry a higher upfront cost than those compatible with our standard custom CNC machining services.
| Setup Type | Labor Intensity | Cost Impact |
|---|---|---|
| Single Setup | Low | Lowest Cost |
| Multi-Axis (5-Axis) | Moderate | Efficient for Complexity |
| Manual Re-fixturing | High | Most Expensive |
Tip 5: Rationalize Material Selection and Thread Depths
Choosing the wrong material or over-engineering small details like holes can inflate your bill faster than almost any other design choice. To keep reducing CNC machining costs, you need to balance performance requirements with the reality of the machine shop floor.
Prioritize Material Machinability
Not all metals are created equal. The harder the material, the slower the machine must run, and the faster the tools wear out.
- Aluminum 6061: The industry favorite for a reason. It is easy to cut, lightweight, and extremely cost-effective.
- Stainless Steel (304/316): Tougher on tools and requires slower speeds, significantly increasing cycle time optimization challenges.
- Inconel & Titanium: Reserved for extreme environments; these materials can triple your costs due to slow removal rates and high tool breakage.
Whether your project requires CNC milling vs turning, selecting a high-machinability grade is the fastest way to slash production expenses.
Debunking the “Blind Hole” Myth
One of the most common mistakes is designing threaded hole depths that exceed functional needs.
- The 3x Rule: Threading deeper than 3 times the hole diameter provides almost no additional holding strength.
- The Cost Factor: Deep threads in blind holes increase the risk of tap breakage and require specialized, expensive tooling.
- Safety Margin: Always leave at least 0.5x diameter of unthreaded space at the bottom of a blind hole to prevent the tap from bottoming out and snapping.
Standardize Your Hardware
Custom threads require custom tooling, which adds lead time and “special order” fees to your quote.
- Stick to Standards: Use common UNC, UNF, or Metric sizes that every shop has in stock.
- Avoid Proprietary Specs: If a standard M5 or 10-32 screw works, don’t design a unique pitch that forces your partner to buy a one-off tap for your job.
| Feature | Cost Impact | Recommendation |
|---|---|---|
| Material Choice | High | Use Aluminum 6061 unless Steel is vital. |
| Thread Depth | Medium | Limit to 2x or 3x the diameter. |
| Tooling | Medium | Use standard tap and drill sizes. |
By focusing on these “small” details, you ensure your design is optimized for CNC machining without sacrificing the structural integrity of the finished part.
The MS Machining Advantage: Beyond the Cutting Tool
We do more than just run machines; we optimize your entire production cycle. At MS Machining, we act as an extension of your engineering team to ensure every part is built for performance and cost-efficiency.
R&D Support and DFM Reviews
Every quote we provide includes a thorough Design for Manufacturability (DFM) review. We look for ways to simplify geometry and reduce cycle times before the first chip is cut. Even if you are just starting with CNC machining basics, our experts help refine your CAD files to avoid common manufacturing pitfalls. This proactive approach is one of our best ways to apply 5 practical design tips for reducing CNC machining costs directly to your project.
Scalability from Prototype to Production
We offer a flexible path for growth. Our facility handles everything from rapid 3D-printed prototypes to high-volume mass production. By streamlining our custom CNC machining parts manufacturing workflow, we make it easy to move from a “proof of concept” to thousands of units without the headache of switching vendors.
Quality Assurance You Can Trust
Our commitment to precision is backed by rigorous industrial standards:
- ISO 9001:2015 Certification: We maintain a quality management system that ensures every batch meets your exact specs.
- Reliable Results: We use calibrated inspection tools to verify tight tolerances and specific surface finishes.
- Transparent Process: From material certifications to final inspection reports, we provide the documentation you need for total peace of mind.
FAQs: Common Questions on CNC Cost Reduction
How do I pick the right fillet radius for my CAD model?
The best approach is the 110% rule. If you intend to use a 10mm end mill, design your internal fillet radii to be 5.5mm. This slight increase prevents the tool from hitting both walls simultaneously in a corner, which significantly reduces tool deflection and prevents chatter marks on your finished surface.
Why does 5-axis machining save me money on labor costs?
While the hourly machine rate is higher, 5-axis centers eliminate the need for multiple manual setups. By leveraging CNC multi-axis turning and milling, we can machine five sides of a part in a single “grab.” This cuts down on the expensive manual labor required for re-fixturing and ensures better dimensional alignment between features.
Is Aluminum 6061 always the cheapest material choice for CNC?
In the United States market, 6061 Aluminum is the gold standard for cost-efficiency due to its high Material Removal Rate (MRR) and low bulk pricing. However, if your design requires extreme complexity, using a 4-axis CNC mill with free-machining plastics or brass can sometimes result in a lower per-unit price because the tools wear down much slower.
What is the best way to handle deep cavities in my design?
To keep CNC machining costs under control, follow these rules for deep pockets:
- The 4:1 Rule: Keep the depth no more than four times the width of the cavity.
- Avoid Tapered Walls: Unless absolutely necessary, keep walls vertical to use standard end mills.
- Modular Design: If a cavity must be exceptionally deep, consider splitting the part into two pieces and joining them with fasteners to avoid expensive, specialized long-reach tooling.


