Introduction: CNC Milling for Prototypes vs Production
At MS Machining, we bridge the critical gap between initial concept and mass manufacturing. While the core technology—removing material via high-precision 3, 4, or 5-axis CNC milling—remains constant, the engineering strategy shifts significantly depending on volume. A prototype run prioritizes speed and design verification, whereas production focuses entirely on cycle time reduction, statistical consistency, and cost efficiency. Understanding this distinction is vital for optimizing both budget and timeline.
Why Process Differences Matter for CNC Machining
Treating a production run like a prototype leads to inflated costs, while treating a prototype like production causes unnecessary delays. In the prototyping phase, we utilize standard workholding and flexible tooling strategies to deliver parts rapidly without Minimum Order Quantities (MOQ). In contrast, production demands custom fixtures and optimized toolpaths to maximize throughput.
Core Strategic Differences:
Feature
Prototype Milling
Production Milling
Primary Goal
Speed & Design Verification
Efficiency & Repeatability
Setup Strategy
Standard Vises / Modular Clamps
Custom Fixtures / Pallets
Cycle Time
Secondary Concern
Critical Cost Driver
Tooling
Standard End Mills
Optimized / Custom Cutters
How Prototype Machining Impacts Product Development
High-precision prototyping serves as the safety net for product engineering. By using the actual production-grade materials—whether Aluminum 6061, Stainless Steel, or PEEK—we validate mechanical properties before committing to expensive hard tooling or large-scale material orders.
Design for Manufacturing (DFM): Early prototypes reveal geometry issues or tight tolerances that would cause failure or excessive wear in mass production.
Functional Validation: Unlike 3D printing, CNC milled prototypes offer the exact structural integrity and surface finish required for rigorous stress testing.
Risk Mitigation: Identifying tolerance conflicts during the “1 to 10 parts” phase prevents costly rework when scaling to 100,000+ units.
Key Differences Between Prototype and Production CNC Milling
Volume and Batch Size Considerations
The most obvious distinction lies in the numbers. When we handle prototypes, we are typically working with quantities ranging from a single unit to a small run of 10 parts. The objective here is purely design verification and functional testing. We don’t worry about optimizing cycle times for thousands of units; we worry about getting the geometry right immediately.
In contrast, production CNC milling scales up significantly. At MS Machining, we manage production runs that can exceed 100,000+ parts. In this phase, our focus shifts from flexibility to efficiency. We utilize multi-fixture setups on our machines to process multiple parts simultaneously, drastically reducing the cost per unit compared to the “one-off” nature of prototyping.
Tolerance and Precision Requirements
Precision is critical regardless of volume, but the approach to quality control evolves. For a prototype, we focus on ensuring that specific unit meets the design intent, often holding tight tolerances of ±0.001mm for critical features to prove the concept works.
In a production environment, the challenge changes to repeatability. It isn’t just about making one perfect part; it is about making 10,000 parts that are identical. We rely on our ISO 9001:2015 certified processes and automated CMM (Coordinate Measuring Machine) inspections to ensure statistical consistency across the entire batch.
Material Selection and Availability
Speed often dictates material choices during the prototyping phase. We frequently utilize readily available stock sizes of aluminum CNC machining parts or standard engineering plastics (like POM or Nylon) to minimize lead times. We use what is on the shelf to get the part in your hands fast.
When transitioning to production, we have the opportunity to optimize for cost and performance. We can source materials in bulk or order custom-sized billets to reduce waste. This is also where we lock in specific alloys—such as Stainless Steel 316 or Titanium Grade 5—that meet the long-term durability requirements of the final product.
Lead Time and Turnaround Expectations
Rapid prototyping is built for speed. Our goal is to turn around functional parts in a matter of days so engineers can iterate on their designs without delay. We prioritize machine availability for these quick-turn jobs.
Production runs operate on a more structured timeline. While we still maintain high efficiency, the lead time accounts for material procurement, setup optimization, and rigorous quality assurance steps. The priority shifts from “fastest possible delivery” to “reliable, on-time delivery” of large quantities.
Feature
Prototype CNC Milling
Production CNC Milling
Quantity
1 to 50 parts
100 to 100,000+ parts
Primary Goal
Speed and Design Verification
Consistency and Cost Efficiency
Setup
Minimal, flexible workholding
Dedicated fixtures, optimized toolpaths
Inspection
100% manual inspection
CMM, Sampling, Statistical Process Control
Lead Time
Rapid (Days)
Scheduled (Weeks)
Process Planning for CNC Milling Prototypes
When we tackle CNC milling for prototypes, our primary goal is speed and verification. We aren’t just making a part; we are helping you prove a concept. The process planning here is distinct from mass production because we prioritize agility over maximizing machine uptime. We treat every prototype as a critical step in your product’s lifecycle, ensuring the transition from a digital CAD file to a physical object is seamless and accurate.
Design Flexibility and Iteration Speed
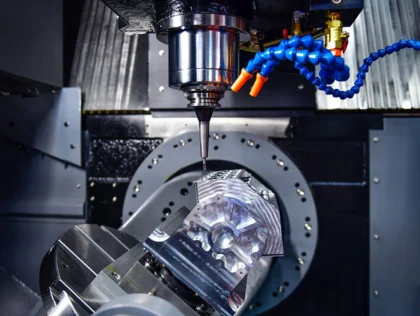
In the prototyping phase, designs change fast. We set up our workflow to accommodate these rapid iterations without stalling the project. By utilizing advanced 3-axis and 5-axis CNC milling machines, we can machine complex geometries with fewer setups. This flexibility allows us to implement design changes on the fly. If our DFM (Design for Manufacturing) review highlights a potential issue, we can adjust the toolpath immediately, ensuring you get a functional part that validates your design intent quickly.
Minimizing Setup Time and Tooling Costs
For low-volume runs or single units, building custom fixtures is rarely cost-effective. We focus on minimizing setup time by using standard workholding solutions like modular vises and soft jaws. This approach eliminates the lead time and expense associated with dedicated tooling. Our strategy is to get the spindle turning as soon as possible. By simplifying the setup process, we keep the initial costs low while maintaining the high precision—down to ±0.001mm—that MS Machining is known for.
Rapid Prototyping Materials and Machinability
Choosing the right stock material is crucial for speed. We often recommend materials that balance performance with machinability to keep cycle times down during the testing phase. Whether you need engineering plastics or custom metal parts, we work with a wide range of standard stock sizes to avoid delays. Aluminum and brass are popular for initial fit-checks due to their ease of machining, while harder alloys like stainless steel or titanium are reserved for functional testing where material properties are non-negotiable.
Impact of Small Batches on Surface Finish
Surface finishing for small batches is often a manual or semi-automated process compared to the bulk finishing used in production. For prototypes, we focus on achieving a functional surface finish that meets your specifications, such as “as-machined” or bead blasted. While we offer comprehensive finishing services like anodizing and plating, applying these to a batch of one or two parts requires careful handling to ensure consistency. We inspect every surface to ensure it meets cosmetic and functional standards before it leaves our shop.
Process Planning for CNC Milling Production Parts
Optimizing Toolpaths for High-Volume Manufacturing
When we shift from a single prototype to thousands of units, every second of cycle time impacts your bottom line. In production planning, we rigorously optimize toolpaths to reduce “air cutting” time and maximize material removal rates. We often transition parts to our 5-axis machines to handle complex geometries in a single setup. This drastically reduces handling time compared to multi-setup 3-axis operations, ensuring the machine spends more time cutting and less time waiting.
Fixture Design and Automation Considerations
Standard vises are excellent for the flexibility required in prototyping, but high-volume runs demand dedicated workholding. We design and machine custom fixtures that can hold multiple parts simultaneously. This “palletizing” approach allows us to machine several components in one cycle, ensuring that best custom CNC machining parts manufacturing remains efficient. Robust fixturing also minimizes vibration, allowing for more aggressive cutting parameters without sacrificing precision.
Consistency, Repeatability, and Quality Control
Consistency is the hallmark of successful production. While a prototype proves the design works, production proves the process is stable. We implement strict ISO 9001:2015 quality protocols, utilizing CMM (Coordinate Measuring Machines) to verify critical dimensions across the entire batch. We monitor tool wear closely to ensure the 1,000th part holds the same tight tolerances (often down to ±0.001mm) as the first part off the line.
Cost Management for Large-Scale Production
The unit cost in production drops significantly compared to prototyping, primarily due to economies of scale. We achieve this through several key strategies:
* **Amortized Setup:** The initial programming and setup time is spread over a large quantity of parts.
* **Bulk Material:** We leverage bulk purchasing for metals like Aluminum and Stainless Steel to lower raw material expenses.
* **Streamlined Workflow:** By minimizing machine downtime and optimizing the process, we reduce overhead and pass those efficiency savings directly to you.
Material Considerations: From Prototype to Production
Selecting the right material is a pivotal step that influences both the functionality of the part and the efficiency of the manufacturing process. As we transition from a single prototype to a full production run, the material strategy often shifts to balance cost, machinability, and final performance requirements.
Common Prototype Materials vs Production Alloys
In the prototyping phase, the priority is often speed and proof of concept. Engineers frequently choose materials that are easier to machine to verify geometry and fit quickly. For example, softer alloys like Aluminum 6061 or engineering plastics like POM (Delrin) are popular choices because they allow for rapid material removal with minimal tool wear.
However, once we move to production, the focus shifts to durability and specific mechanical properties. We might transition to harder machined metal parts and materials like Stainless Steel 304/316 or Titanium Grade 5 if the application demands high corrosion resistance or strength-to-weight ratios. At MS Machining, we ensure that even if the material changes, the transition is managed carefully to maintain the integrity of the design.
Material Hardness and Machining Challenges
Material hardness directly impacts machine cycle times and tool life. When scaling up to production, machining harder materials requires optimized feed rates and specialized cutting tools to prevent premature wear and maintain tolerances as tight as ±0.001mm.
Here is a quick comparison of how common materials impact the CNC process:
Material Type
Machinability
Production Impact
Typical Application
Aluminum (6061/7075)
High
Fast cycle times, lower tool wear.
Housings, brackets, aerospace components.
Stainless Steel (303/304)
Medium
Slower speeds required to manage heat.
Medical devices, marine hardware.
Titanium (Gr 5)
Low
Requires rigid setup and specialized cooling.
High-stress aerospace and medical implants.
Plastics (PEEK/POM)
High
Very fast, but requires sharp tooling to avoid melting.
Insulators, bushings, medical guides.
Surface Finish Expectations for Different Materials
Surface finish requirements often become more stringent during production. A prototype might only require an “as-machined” finish to verify dimensions, but a consumer-facing production part usually needs a refined aesthetic.
Different materials respond differently to post-processing. For instance, aluminum is an excellent candidate for anodizing, which provides both color and surface hardness. Understanding how anodizing aluminum works helps in planning the final steps of production to ensure color consistency across thousands of parts. Harder metals like stainless steel might undergo electropolishing or passivation, processes that must be accounted for in the final production timeline and cost structure.
Tooling and Equipment Differences
Flexibility of Prototype CNC Milling vs Dedicated Production Machines
When we tackle prototype projects, flexibility is the name of the game. We rely on versatile machines that allow for rapid setup changes because we might switch between five different designs in a single day. The goal here isn’t maximizing spindle uptime for a week straight; it’s about getting the first part off the machine quickly to verify the design.
In contrast, production environments demand dedicated equipment. Once a part moves to high-volume manufacturing, we often utilize dedicated work cells or pallet changers designed to run the same job thousands of times without interruption. For CNC Milling for Prototypes vs Production, the shift is from general-purpose versatility to hyper-specialized efficiency. Our custom CNC machining capabilities allow us to bridge this gap, utilizing flexible setups for initial runs before locking down a rigid process for mass production.
Key Equipment Differences:
Prototypes: Standard vises, modular fixtures, and quick-change tooling.
Production: Custom tombstones, hydraulic clamping, and automated pallet pools.
Impact of Multi-Axis Machining on Complex Parts
Multi-axis machining, particularly 5-axis milling, is often the preferred route for complex prototypes. It allows us to machine intricate geometries in a single setup, drastically reducing the time spent designing fixtures. This “done-in-one” approach is perfect when you need a functional part immediately and don’t care about optimizing cycle time down to the second.
However, as we scale up, our CNC engineering services team evaluates if that 5-axis approach is still economical. Sometimes, it makes more sense to split the process across multiple cheaper 3-axis machines with dedicated fixtures for production. While 5-axis offers precision, dedicated 3-axis lines can often churn out parts faster and cheaper once the tooling is built.
Tool Wear, Replacement, and Maintenance Strategies
Tool management changes drastically depending on volume. When machining a single prototype, we rarely worry about a cutter wearing out halfway through the job unless we are cutting hardened steel. We use sharp, standard tools to ensure a great surface finish and dimensional accuracy without overthinking tool life.
In a production run, tool wear becomes a critical variable. We have to calculate exactly how many minutes a tool can run before it drifts out of tolerance or breaks. We implement redundant tooling (sister tooling) in the magazine so the machine can automatically swap to a fresh cutter without stopping.
Feature
Prototype Tooling Strategy
Production Tooling Strategy
Tool Selection
Standard, off-the-shelf end mills
Custom-ground or high-performance coated tools
Replacement
Reactive (replace when dull)
Predictive (replace after X parts)
Monitoring
Visual inspection by operator
Automated load monitoring and laser checks
Objective
Best surface finish immediately
Consistent life and lowest cost per part
Cost Implications and Time-to-Market
The financial strategy behind CNC milling shifts drastically depending on the stage of your project. In the prototyping phase, the priority is speed and validation; you are essentially buying engineering time and quick setups. In production, the focus flips to unit cost reduction, where you pay for machine efficiency and material optimization. Understanding this shift helps you plan your budget effectively from the first concept model to the final shipment.
Balancing Prototype Iterations and Production Efficiency
During development, we prioritize flexibility. We avoid expensive, permanent tooling in favor of standard workholding that allows us to load parts quickly. The goal is to get a functional part in your hands for testing as fast as possible. While the per-unit cost is higher due to the setup time being amortized over fewer parts, this flexibility allows for rapid design changes without financial penalty.
Once the design is locked, we switch gears to efficiency. We invest time in programming optimized toolpaths and creating custom fixtures. This upfront investment pays off by drastically reducing cycle times for the long haul, ensuring that high-volume runs meet strict delivery schedules.
Reducing Waste and Rework in Prototyping
Prototyping is your insurance policy against manufacturing failure. It is significantly cheaper to identify a design flaw on a single machined unit than to scrap a production run of 5,000 parts. Our custom machining services include comprehensive DFM (Design for Manufacturing) feedback. We analyze your CAD files to catch issues like impossible undercuts or tight tolerances that drive up costs unnecessarily.
Key benefits of early validation include:
Material Verification: Confirming the chosen alloy performs as expected in real-world conditions.
Fit and Function: Ensuring the part assembles correctly with other components before mass production.
Process Proofing: Identifying difficult machining features that need adjustment before scaling up.
Economies of Scale in Production CNC Milling
The transition to production is where you see the return on investment. As quantities increase, the cost per part drops significantly. This is driven by several factors that we leverage for large-scale orders ranging from 100 to 100,000+ parts:
Amortized Setup Costs: The cost to set up the machine is spread across thousands of units rather than just one.
Material Buying Power: Purchasing raw materials in bulk reduces the base cost of the metal or plastic.
Cycle Time Reduction: We use high-speed machining strategies and multi-axis capabilities to minimize the time the part spends in the machine.
Quality Control and Inspection Differences
The way we handle quality control (QC) shifts dramatically depending on the volume. In CNC milling for prototypes vs production, the goal changes from verifying a single design concept to ensuring thousands of parts are identical.
Prototype Inspection Methods (Quick Validation)
When I am milling a prototype, speed is often the priority. The main goal here is design verification—does the part fit? Does it function as intended? We aren’t usually looking for process capability data yet.
For prototypes, inspection is mostly manual. We rely on:
Hand Tools: Calipers, micrometers, and height gauges.
Fit Checks: Physically mating the part with other components in the assembly.
Visual Inspection: Checking for surface anomalies or obvious machining errors.
We inspect 100% of the parts because the batch size is usually one to five units. If a dimension is slightly off but the part still works for the test, we might note it for the next revision rather than scrapping it immediately.
Production Part Inspection (CMM, Statistical Process Control)
Once we move to production, manual checks become inefficient and prone to human error. The focus shifts to repeatability and speed. We need to prove that the manufacturing process is stable.
For high-volume runs, we utilize:
Coordinate Measuring Machines (CMM): Automated probes that measure complex geometries with extreme precision.
Statistical Process Control (SPC): We monitor data points to predict tool wear and drift before bad parts are made.
Custom Gauging: Dedicated go/no-go gauges designed specifically for that part to speed up checks.
This level of rigor is especially important when utilizing special CNC machining processes that involve tight tolerances or complex multi-axis features. We can’t afford to guess; the data has to be exact.
Ensuring Dimensional Consistency Across Large Batches
In production CNC milling, we cannot measure every single dimension on every single part—it would cost too much time. Instead, we rely on structured sampling plans to ensure consistency.
Key Production QC Strategies:
First Article Inspection (FAI): A comprehensive check of the very first part off the line to verify the setup.
In-Process Inspection: Operators check critical dimensions at set intervals (e.g., every 50 parts) to catch tool wear.
Final Sampling: A random check of the finished lot based on AQL (Acceptable Quality Limit) standards.
Comparison of QC Approaches:
Feature
Prototype QC
Production QC
Primary Goal
Verify Design/Function
Verify Process Stability
Inspection Rate
100% of parts
Sampling (AQL)
Tools Used
Calipers, Micrometers
CMM, Vision Systems, Custom Gauges
Documentation
Basic dimensional report
Full PPAP, FAI, SPC Data
Flexibility
High (deviations allowed)
Low (strict adherence to print)
Common Challenges When Transitioning from Prototype to Production
Scaling up isn’t as simple as just hitting “repeat” on the CNC machine. The transition from a single design validation unit to full-scale manufacturing exposes bottlenecks that don’t exist in a low-volume environment. We have to address specific engineering and logistical hurdles to ensure the project remains profitable and efficient.
Adjusting Tolerances for Mass Manufacturing
In the prototyping phase, engineers often apply tight tolerances across the board just to be safe. However, in the context of CNC milling for prototypes vs production, maintaining unnecessary precision on every feature destroys profitability. High-volume manufacturing requires a critical review of Geometric Dimensioning and Tolerancing (GD&T).
We focus on loosening tolerances on non-critical features that do not impact the part’s fit or function. If a surface doesn’t mate with another component, relaxing the tolerance allows the machine to run faster and reduces the rate of scrapped parts due to minor deviations.
Optimizing Toolpaths and Setup for Volume
A toolpath designed for a prototype prioritizes safety and surface finish over speed. When we move to production, that logic flips. We need to optimize toolpaths to minimize “air cutting” (time when the tool isn’t touching metal) and maximize material removal rates.
We also change how we hold the parts. Standard vises used for prototypes are replaced with custom fixtures or tombstones.
Multi-Part Fixturing: We load multiple parts into the machine at once to increase throughput.
Cycle Time Reduction: Even shaving 10 seconds off a cycle saves massive amounts of time over a 10,000-part run.
Automation: We often integrate pallet changers to keep the spindle running while the operator loads the next batch.
Material Substitutions and Supplier Considerations
Sourcing material for five prototypes is vastly different from securing a supply chain for thousands of units. Often, the premium material used for the prototype is too costly or difficult to machine at scale. We may recommend switching to a material with better machinability ratings that still meets the mechanical requirements.
In some high-volume scenarios, it makes sense to change the initial forming process. For example, rather than milling a complex part entirely from a solid block, we might utilize a stainless steel investment casting guide to create a near-net shape first. We then use CNC milling only for the critical features, significantly reducing material waste and machining time.
How Experienced CNC Machining Services Guide the Transition
Transitioning from a single prototype to full-scale manufacturing is a critical phase where costs can skyrocket if not managed correctly. At MS Machining, we don’t just cut metal; we act as strategic partners to bridge the gap between concept and commerce. Our goal is to ensure your design is not only functional but also commercially viable for volume production.
Design for Manufacturability (DFM) Advice
Before we cut a single chip, our engineering team reviews your CAD files to identify potential bottlenecks. Design for Manufacturability (DFM) is about optimizing your part for the machining process. We look for features that are unnecessarily expensive to produce, such as deep pockets with tight radii or complex undercuts that require specialized tooling.
By providing early feedback, we help you adjust geometry to simplify machining without compromising performance. This level of CNC precision engineering ensures that when you are ready to scale, your design is already optimized for the most efficient production cycle possible.
Process Recommendations to Minimize Cost and Risk
Scaling up introduces new risks, particularly regarding material costs and machine time. We analyze the entire production workflow to recommend changes that save money over thousands of parts. This might involve:
Material Selection: Suggesting alloys that offer similar performance but are easier and faster to machine.
Standardization: Aligning hole sizes and threads with standard tooling to avoid custom tool costs.
Finishing Options: Recommending surface finishes that are durable yet cost-effective for mass application, such as batch anodizing or bead blasting.
Aligning Prototype Insights With Production Expectations
The data gathered during the prototyping phase is invaluable. Because we handle both rapid prototyping and large-scale production (from 1 to 100,000+ parts), we ensure that the lessons learned during the initial run are applied to the final manufacturing process.
If we encounter a tolerance issue or a difficult feature during the prototype stage, we address it immediately by designing custom fixtures or adjusting toolpaths for the production run. This continuity guarantees that the final production parts match the quality and function of the approved prototype, eliminating surprises and ensuring a smooth entry into the market.


 When we tackle CNC milling for prototypes, our primary goal is speed and verification. We aren’t just making a part; we are helping you prove a concept. The process planning here is distinct from mass production because we prioritize agility over maximizing machine uptime. We treat every prototype as a critical step in your product’s lifecycle, ensuring the transition from a digital CAD file to a physical object is seamless and accurate.